How I set up this site: Google Domains + Ghost
Problem: Too many options out there
I've always wanted a personal site, but there are just too many options out there. There are like 3+ options for each of components - domain registrar, web hosting, CMS, that you need to pick, making it at least 9+ different combinations to select from.
Just decide! Google Domains + Ghost
Ultimately, I just wanted a simple site where I can redirect people to my LinkedIn for jobs and write a simple blog to remember the things I've been learning and doing. After a lot research, I ended with Google Domains + Ghost. Main reason that I picked Google Domains + Ghost was that's the stack that Youtuber Ali Abdaal recommended. Also, I was getting tired of just researching and not starting.
Start by doing
Setting up Google Domains
- Get a url. I debated for a long time on the url name. Ended up landing on ".com" since I still think it's the most common. I struggled with the idea of paying $12/yr, but finally became at peace with it after realizing it's just the price of a drink.
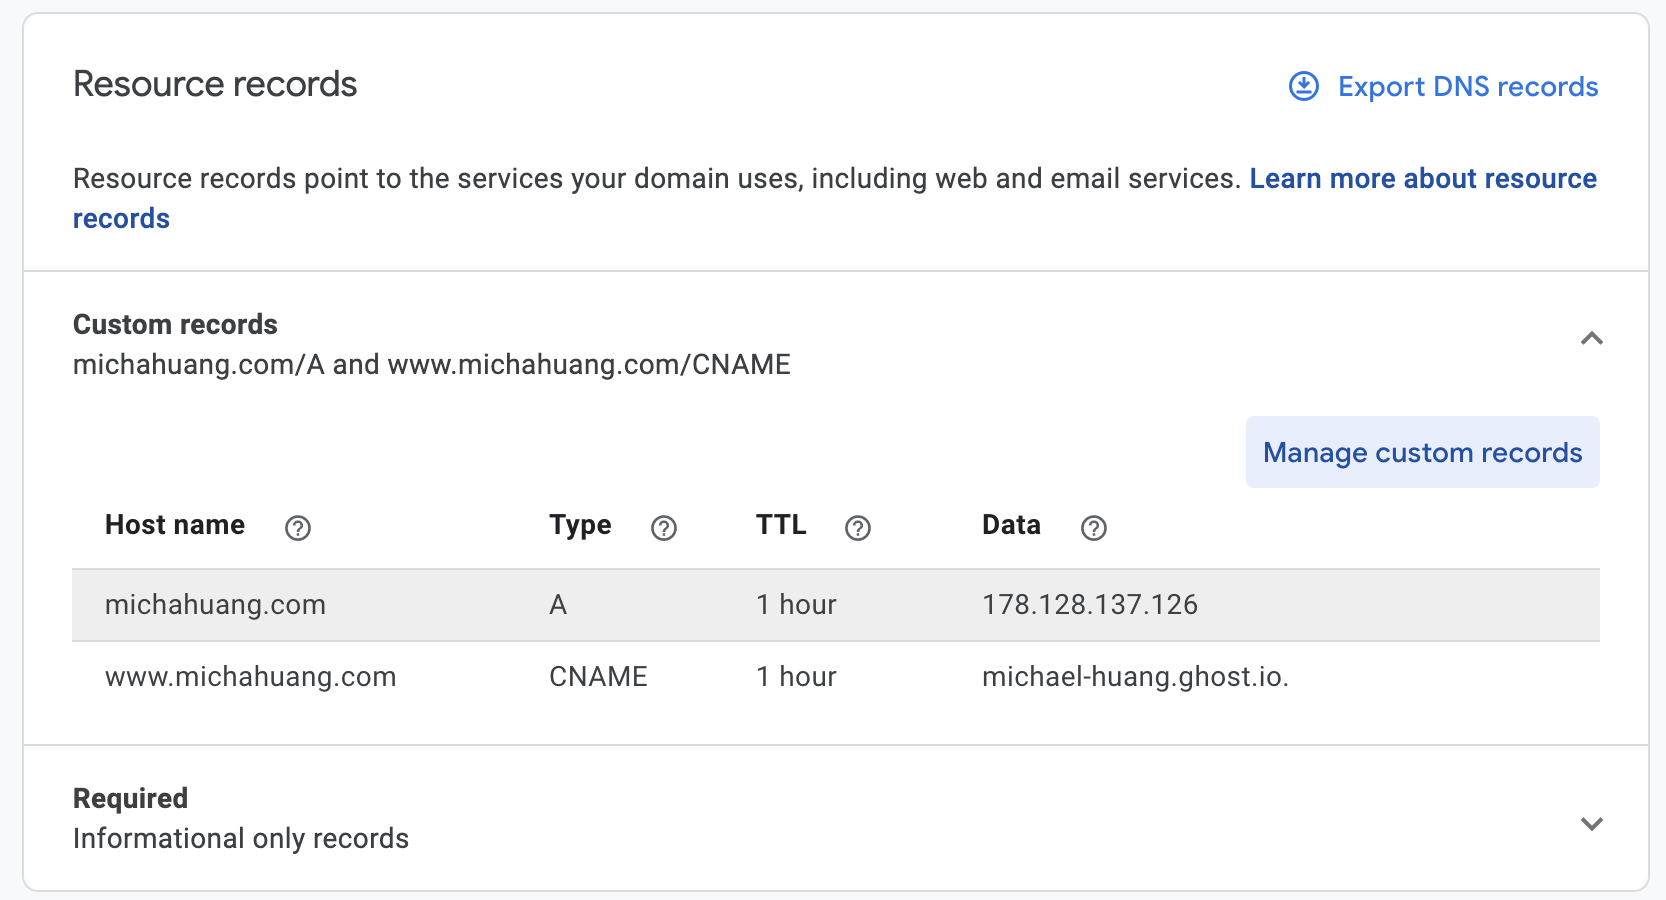
- The only thing I had to configure on the Google Domains side was DNS settings. It sounded complicated, but it's quite easy. You just have to change the resource records to point to the Ghost url like in the picture. You can find what to fill in for the "Data" columns on the Ghost admin panel.
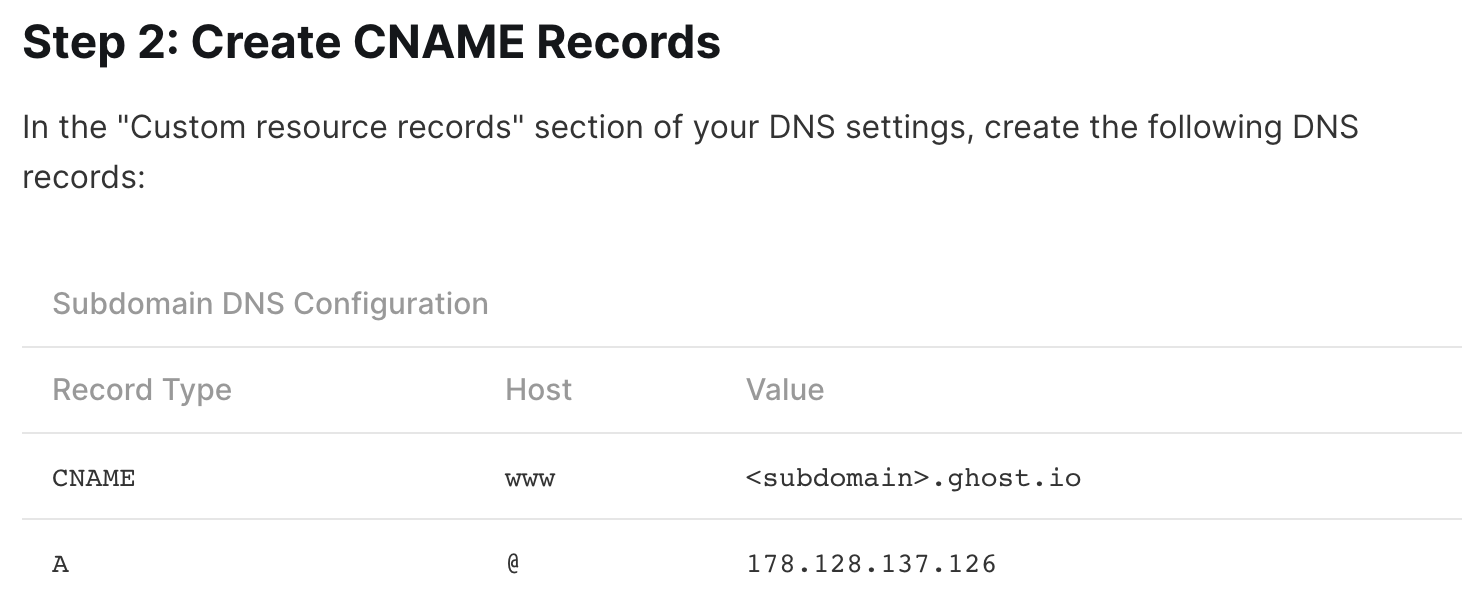
On the Ghost Admin panel side
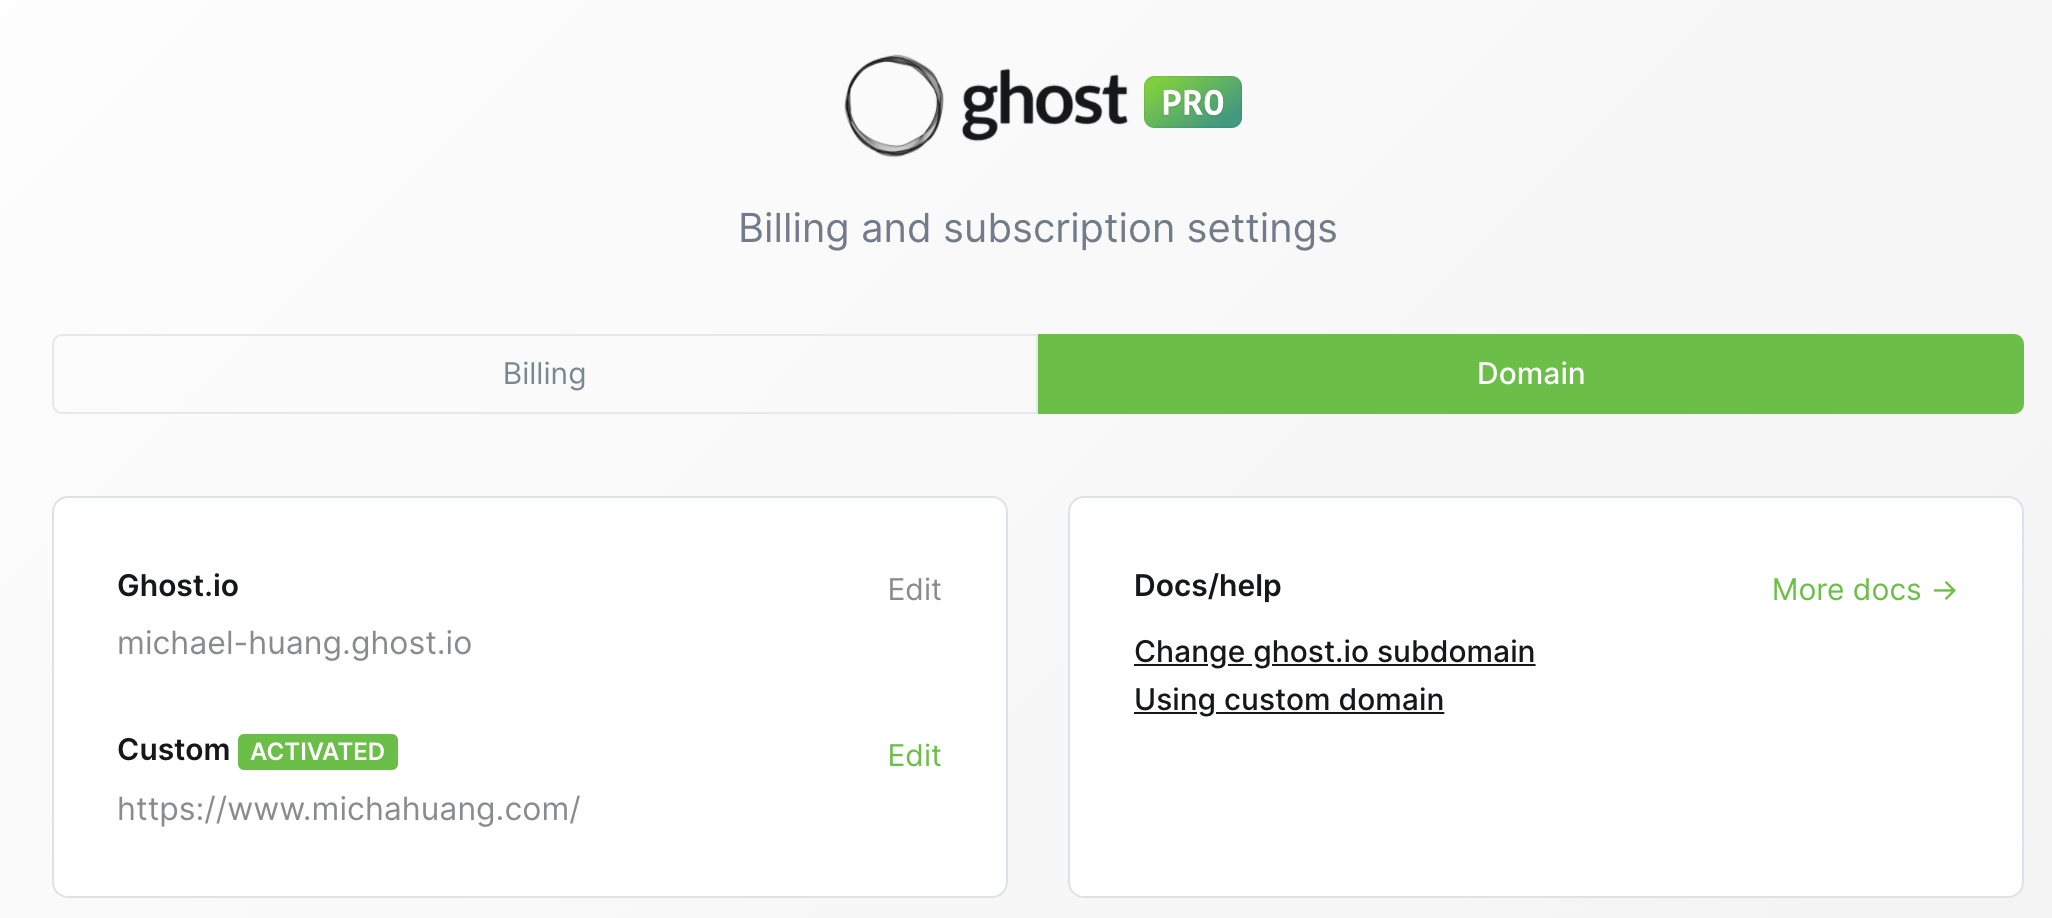
- Go to Ghost(Pro) > Domains
- Get the CNAME info from the "Docs/help" section
- Active your custom domain back in the Ghost(Pro) Domain page
After this step, you pretty much have a working custom url website already. You can customize the look and feel even more by going into playing with themes on Ghost.
Setting up Ghost
Branding
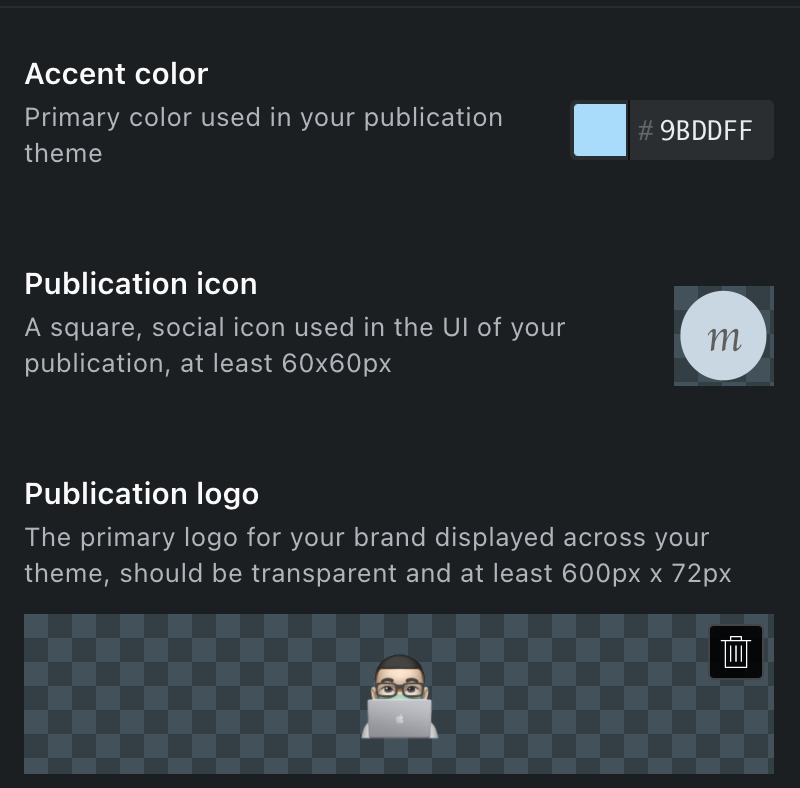
- I found getting a square icon surprisingly difficult. I ended up using instant alpha and image resizing using the built in Preview app on macOS.
Ghost themes - the hardest part
The hardest and most fun part ended up being playing with Ghost themes. I haven't used node/css/html in such a long time. It was nice opening up the theme and looking through all the files. The Ghost theme files are just zip files you can extract that show the handlebar files, css (for styling), and html.
I ended up reading up on git, nvm, npm, node, and gscan. Ended up using this Dana Hooshmand's blog post a lot for help, especially with playing with node versions.
- Git - version control
- nvm - node version manager
- npm - node package manager
- gscan - tool from Ghost to check if themes have been completed once you edit the files.
Handlebar files (.hbs files)
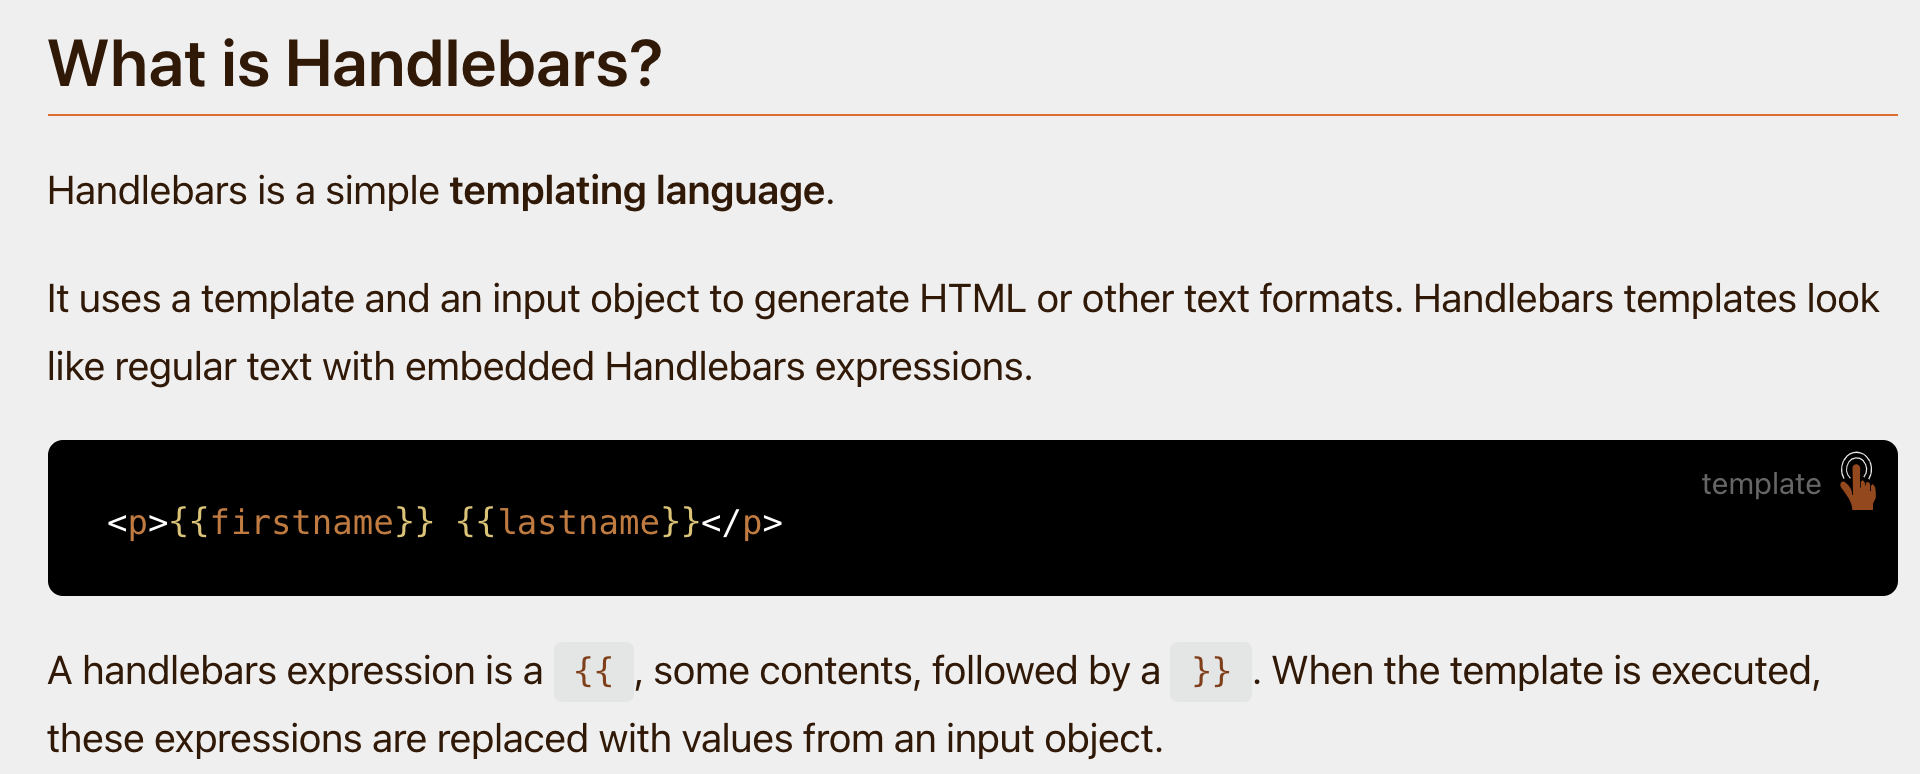
The new idea I had to pick up for using Ghost themes was dealing with Handlebar files. Handlebar documentation and is pretty good and can be found here. There are a lot of handlebar files that come in the theme package. The most important are default.hbs, and index.hbs.
Handlebar Expressions
- Handlebar expressions pretty much make writing HTML easier by translating the "{{" and "}}" you write into the ugly HTML tags.
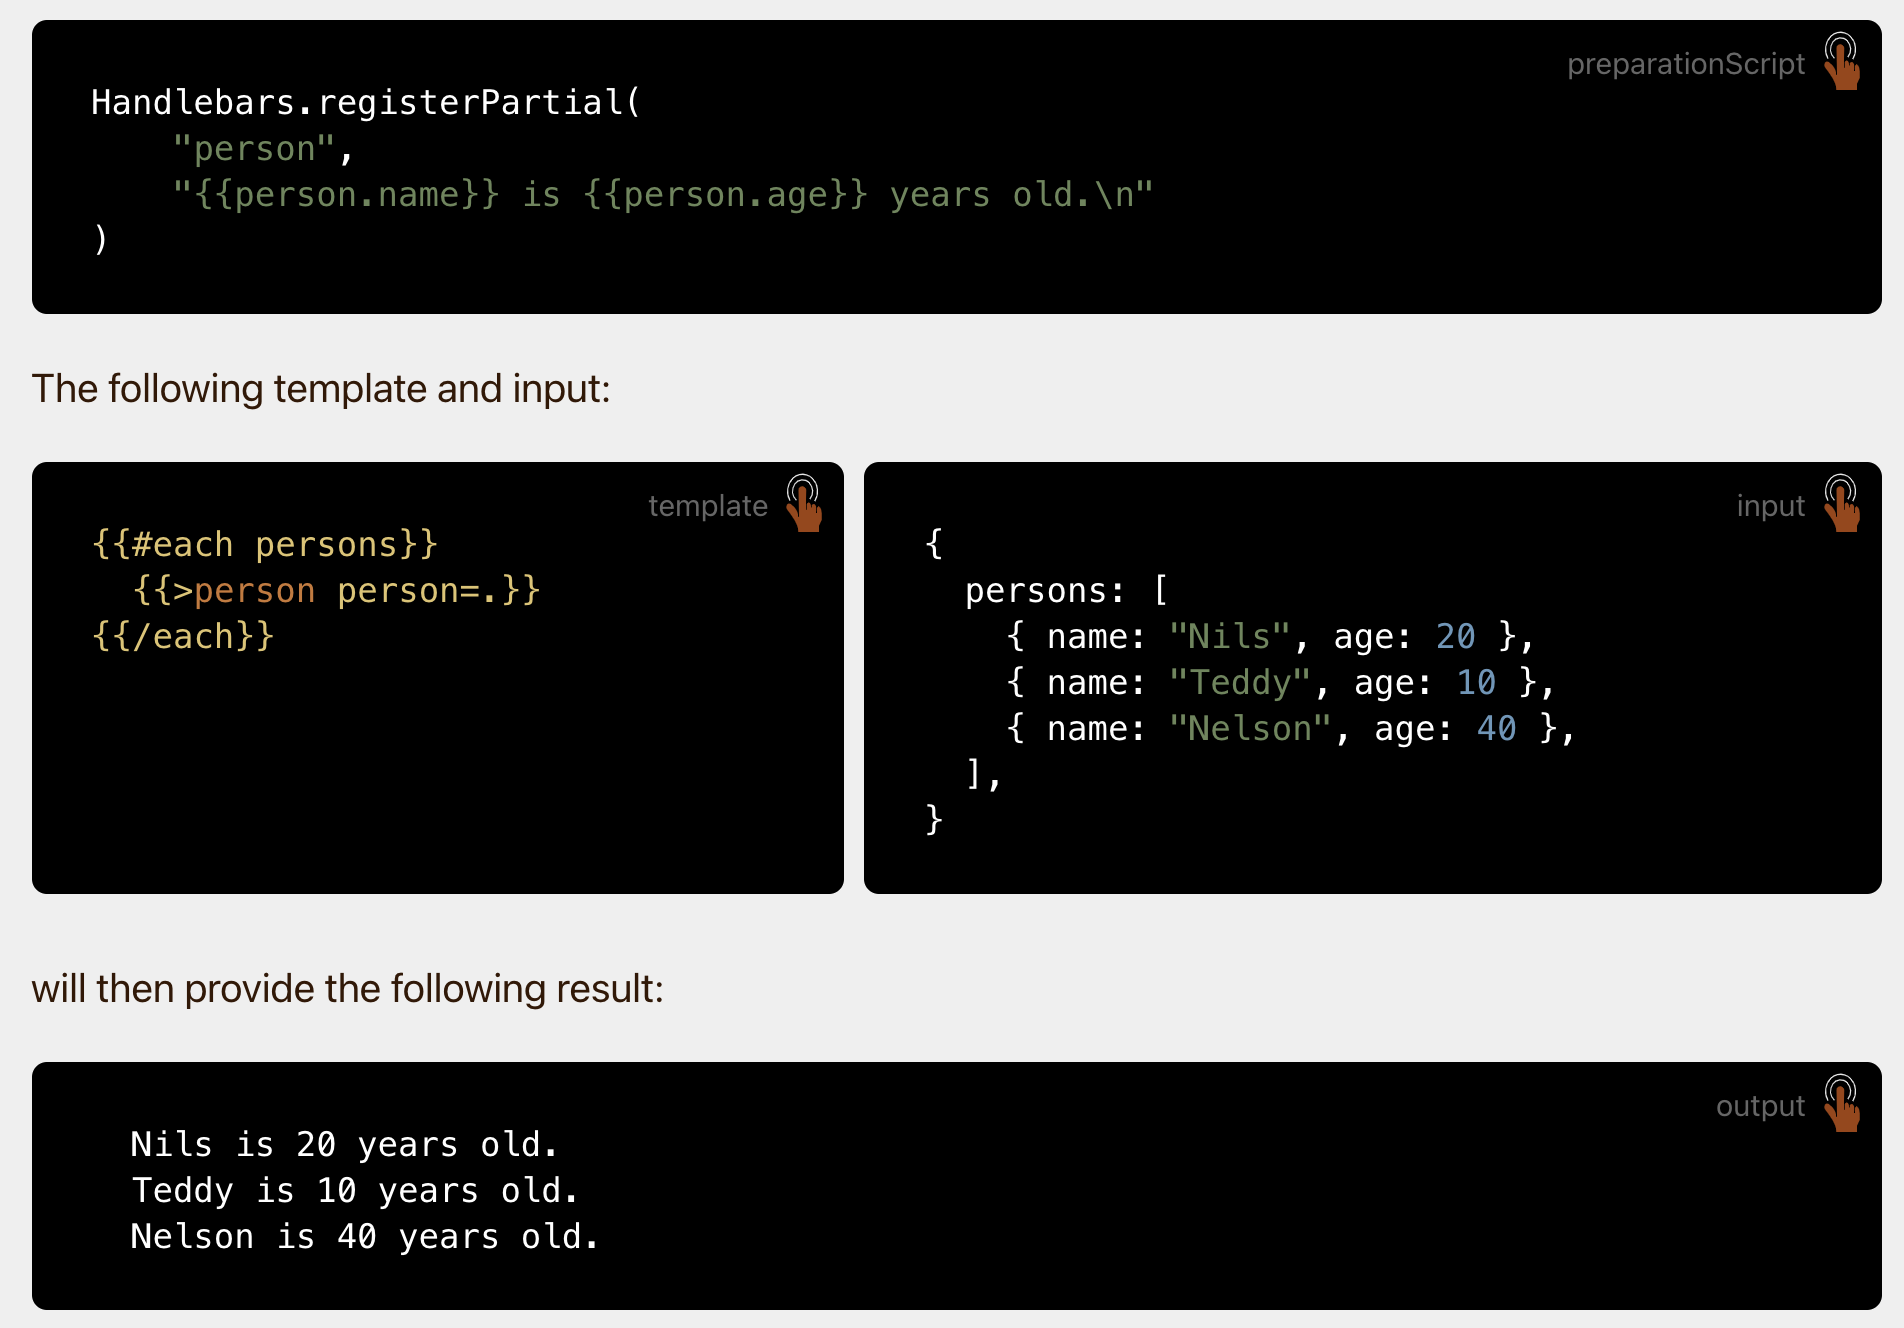
Handlebar Partials {{<
- there was also a big folder called "Partials" inside the Ghost theme folder
- when looking at the main "default.hbs", I found a lot of usage of "{{<" - "{{<" this ended up just meaning refer to the partial file
- A Handlebar Partial is just something that lets you reuse code by putting code you re-use into its own .hbs file and you can call it by using {{<
- For example:
Turning off the "Subscribe" button for a clean look
Initially Ghost had this annoying floating "Subscribe" button, you can turn it off by going to Settings > Membership > Customize Portal > Turn off Portal Button. I learned from here.

I am glad I still remember a little bit of css.
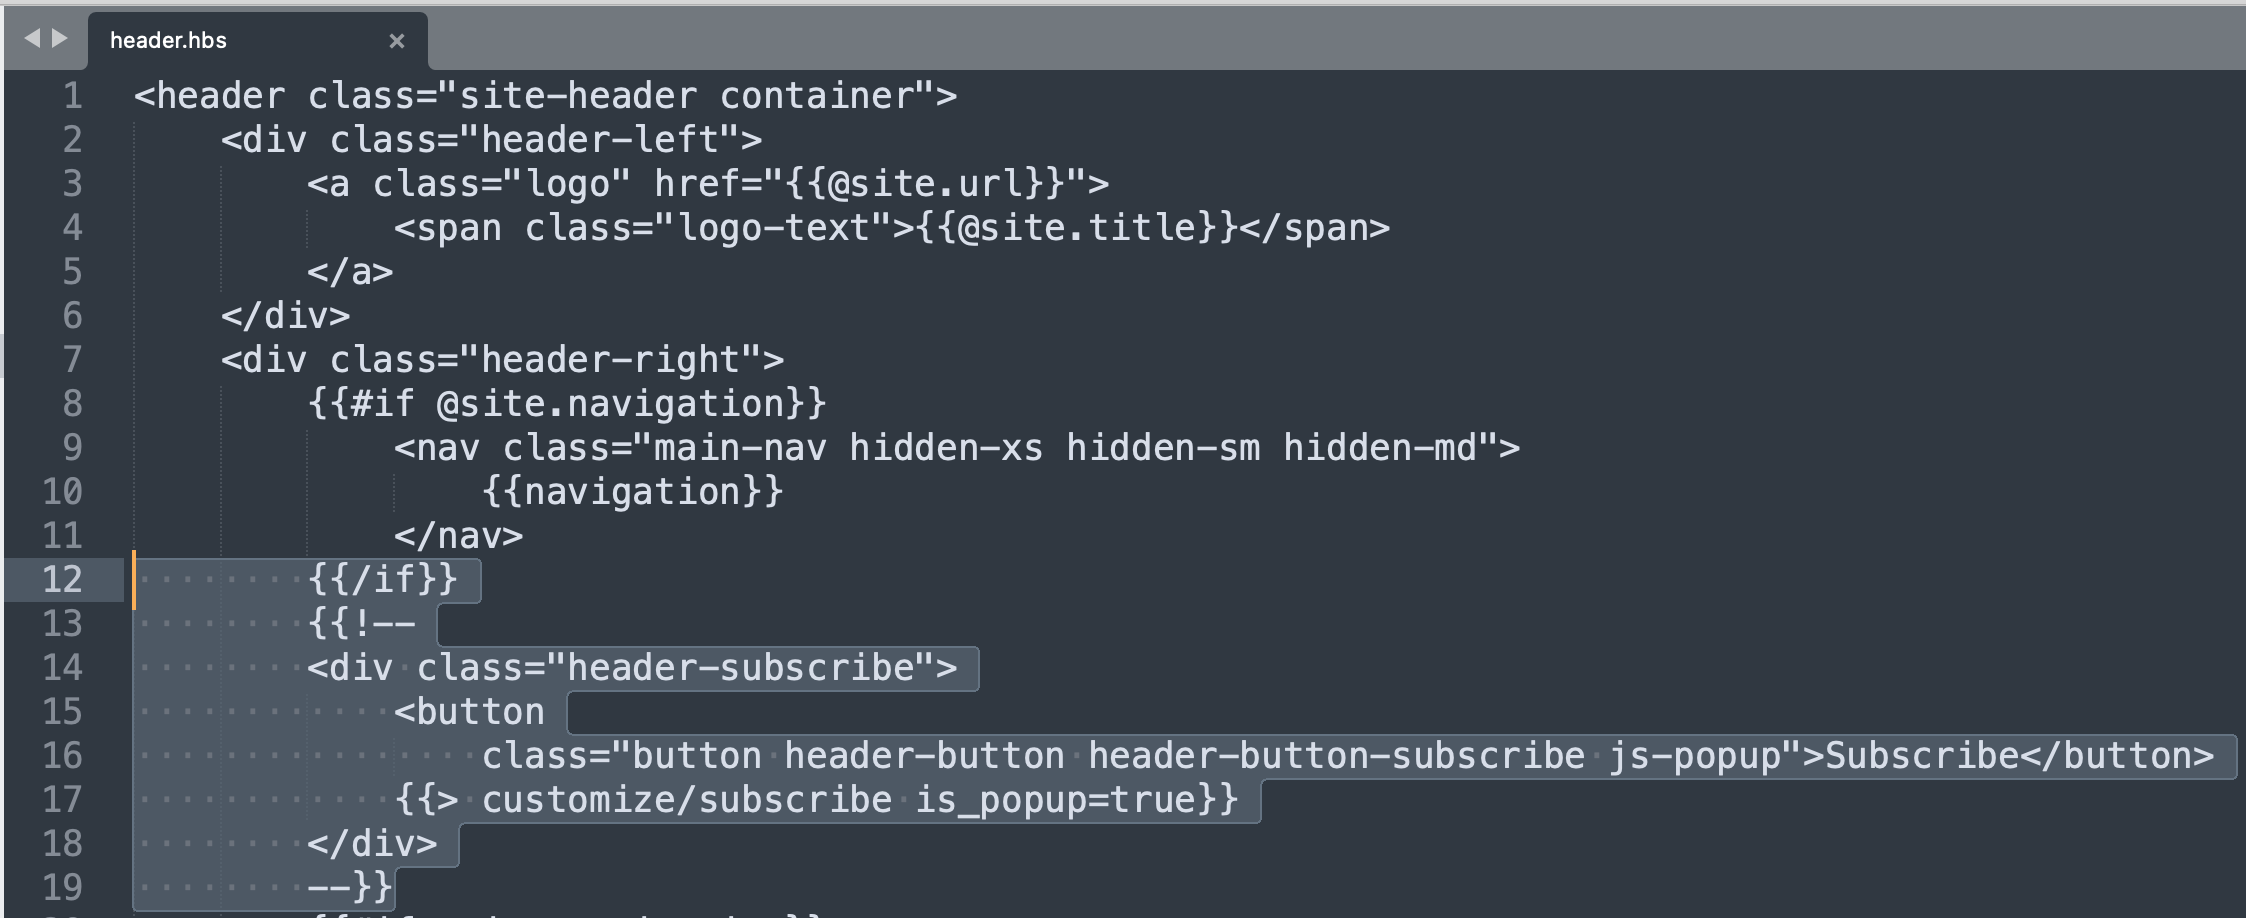
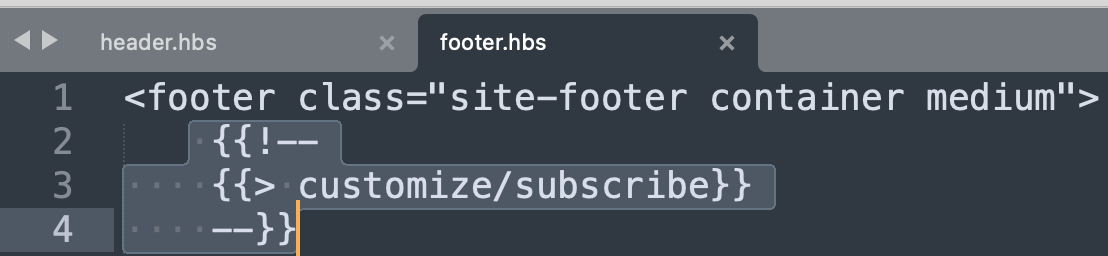
Simplifying the Wave theme
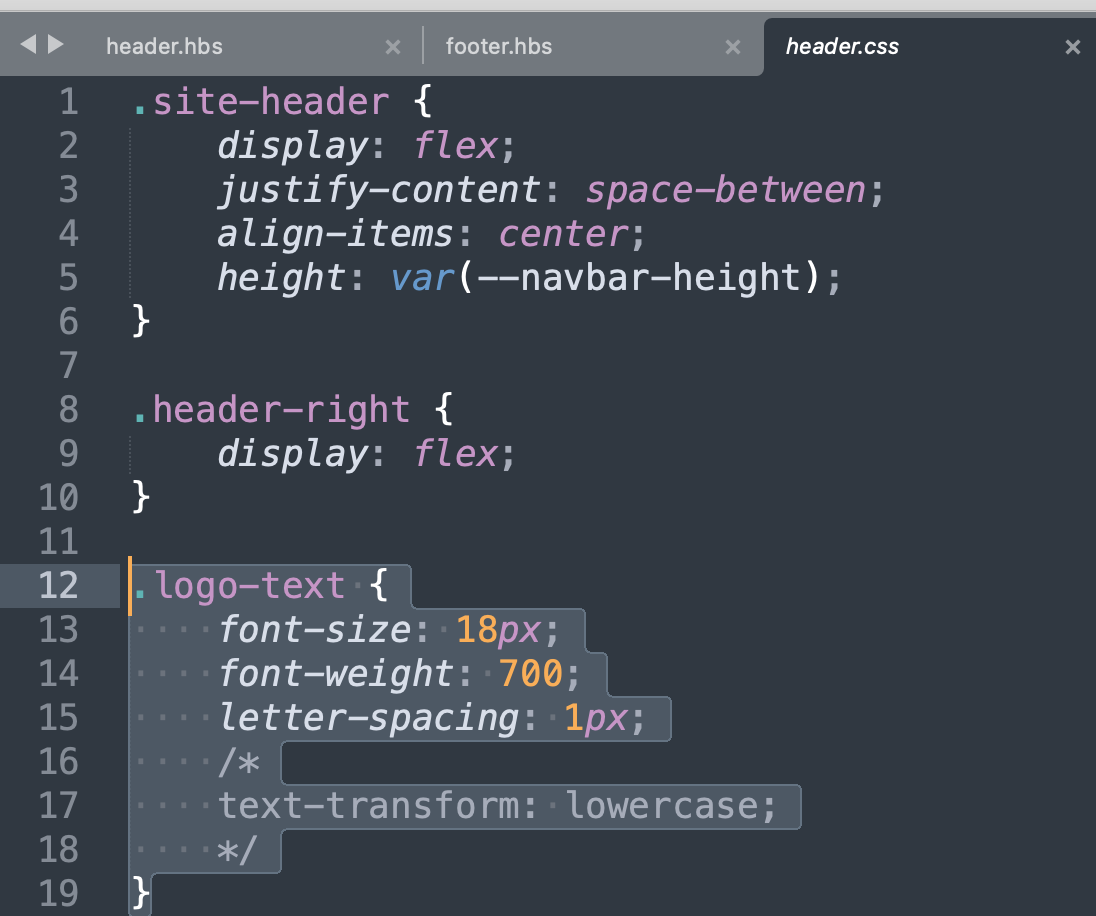
Since Wave was supposed to be use for podcasts, they had built in podcast buttons. I had to manually comment out sections of the Wave theme to remove them. I modified "header.hbs" and "footer.hbs"
One more thing I'm trying to figure out - how to make my header from all caps to normal. I tried editing the assets/site/header.css but it hasn't worked yet. Will have to play around more.
Github link to my modified wave theme here.
 chmhuang
(wow cool ~ I copy/pasted the Github link, and Ghost automatically created a card for me)